
We’ve outlined the step by step instructions for replacing the injector set on your Fleck 5600 Metered Softener. Keep in mind that your system may not look exactly the same as the one shown, but that is OK.
Step 1 – Shut your main water off OR turn your pump breaker off and then run some water AFTER the water softener (this will purge out the water and reduce the water pressure). If you do NOT shut the water off before you remove the injector set, water will leak everywhere. Put your softener in a bypass. (Located on the back of your valve)
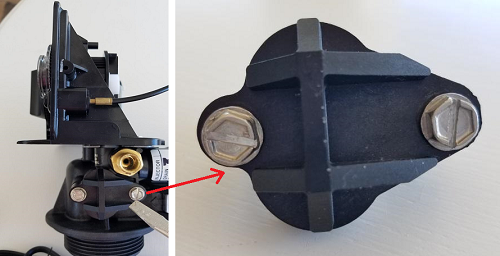
Step 2 – Locate (right side of valve) and remove the injector set cover (two screws).
Be careful NOT to lose the O-ring (rubber circle) that is part of the cover. See below.
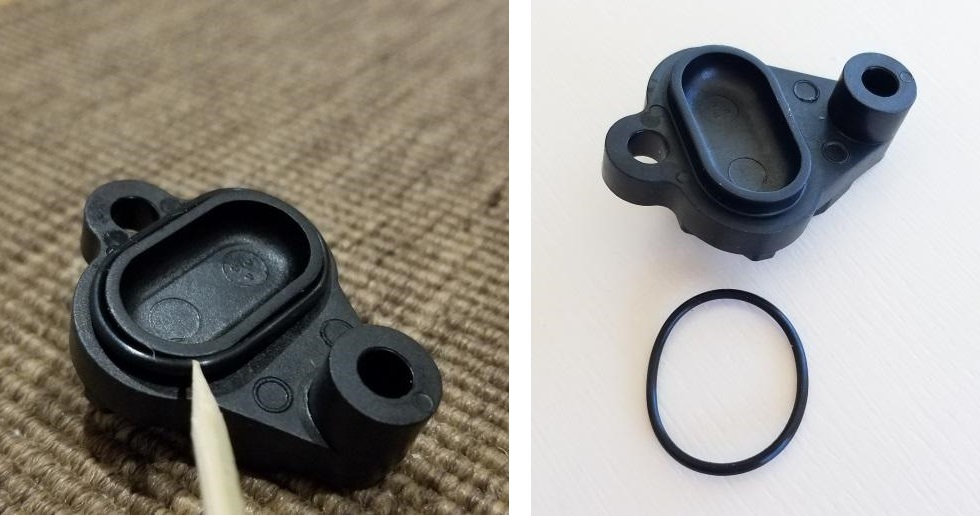
The photo on the right is the O-ring now OFF of the cover. It slips around the outside of the oval. Don’t remove it, just make sure that it is there when you put the cover back on or you will have a leak.
Step 3 – With the cover off, use your flat screwdriver to unscrew (counter clockwise) the TWO white parts of the injector set – they are stacked. They are called the injector nozzle (short and fat) and the injector throat (long and skinny). If your set is NOT white that is ok. Most homeowners will have a white set but they can be other colors. The same instructions will apply.
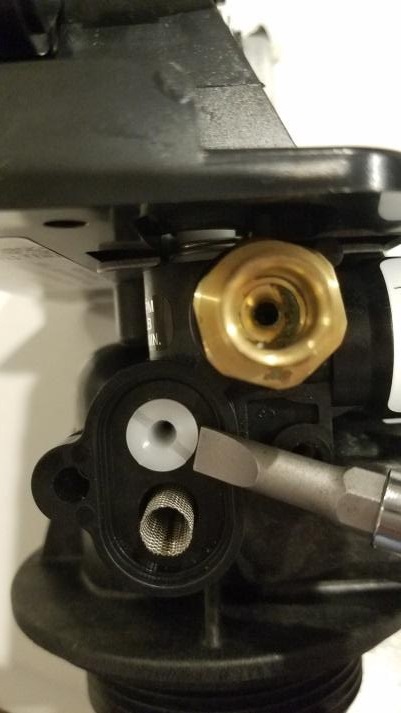
Step 4 – Clean or Replace. If you are re-using the set, use a tooth pick to poke out the holes on the throat and nozzle. THEY MUST BE CLEAN! It is always better to install a new set but a cleaned one will be okay if it is not scarred or damaged. Remove and clean the screen as well. Both holes must be clean. Below is what they should look like out of the valve and clean or new.
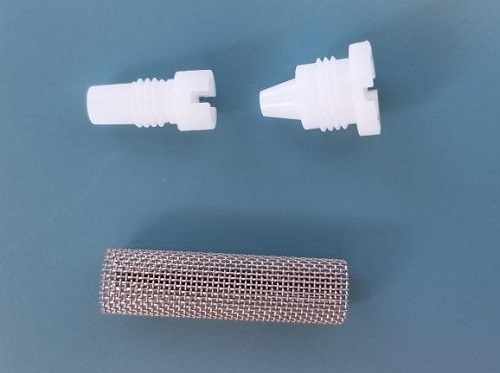
Step 5 – Screw back (clockwise) in the new or cleaned throat (long and skinny) followed by the nozzle (short and fat). Tighten but do NOT over tighten. Insert the screen in the bottom hole.
Step 6 – Reattach the injector cover with the two long screws. Make sure the cover still has the O-ring.
Step 7 – Turn the water and/or pump back on. Run some water slowly in your tub to purge out any air.
CONGRATULATIONS – YOU ARE DONE!
Please be advised that we offer this information with good intentions but you must proceed at your own risk. Thanks for reading!